Getting Started with CCI xG Testbed
CCI xG Testbed provides a platform consisting of wireless and computing resources for researchers to carry out advanced wireless research. Users can access the platform by completing the User Sign-up Form with their personal and project details. Once approved, users can utilize the allocated resources for executing their wireless experiments.
Access and Account Creation
User Sign-up Process
To gain access to the CCI xG Testbed, you need to complete the User Sign-up Form:
CCI xG Testbed User Sign-up Form
Note
Account requests typically take 2 business days for approval.
Once your submission is reviewed and approved, the Administrative team will send you an email containing your access instructions. All CCI xG Testbed resources are centralized through our Single Sign-On (SSO) portal.
How to Access Your Dashboard
Open the Portal
You can access the CCI xG Testbed portal in either of the following ways:
Go to the CCI xG Testbed website and select User → Login from the top navigation menu.
Or directly open the portal at CCI xG Testbed Portal.

Accessing the portal from the CCI xG Testbed website.
Sign In
On the login page, select Continue with CILogon. CILogon allows you to securely authenticate using your university or institutional identity provider.
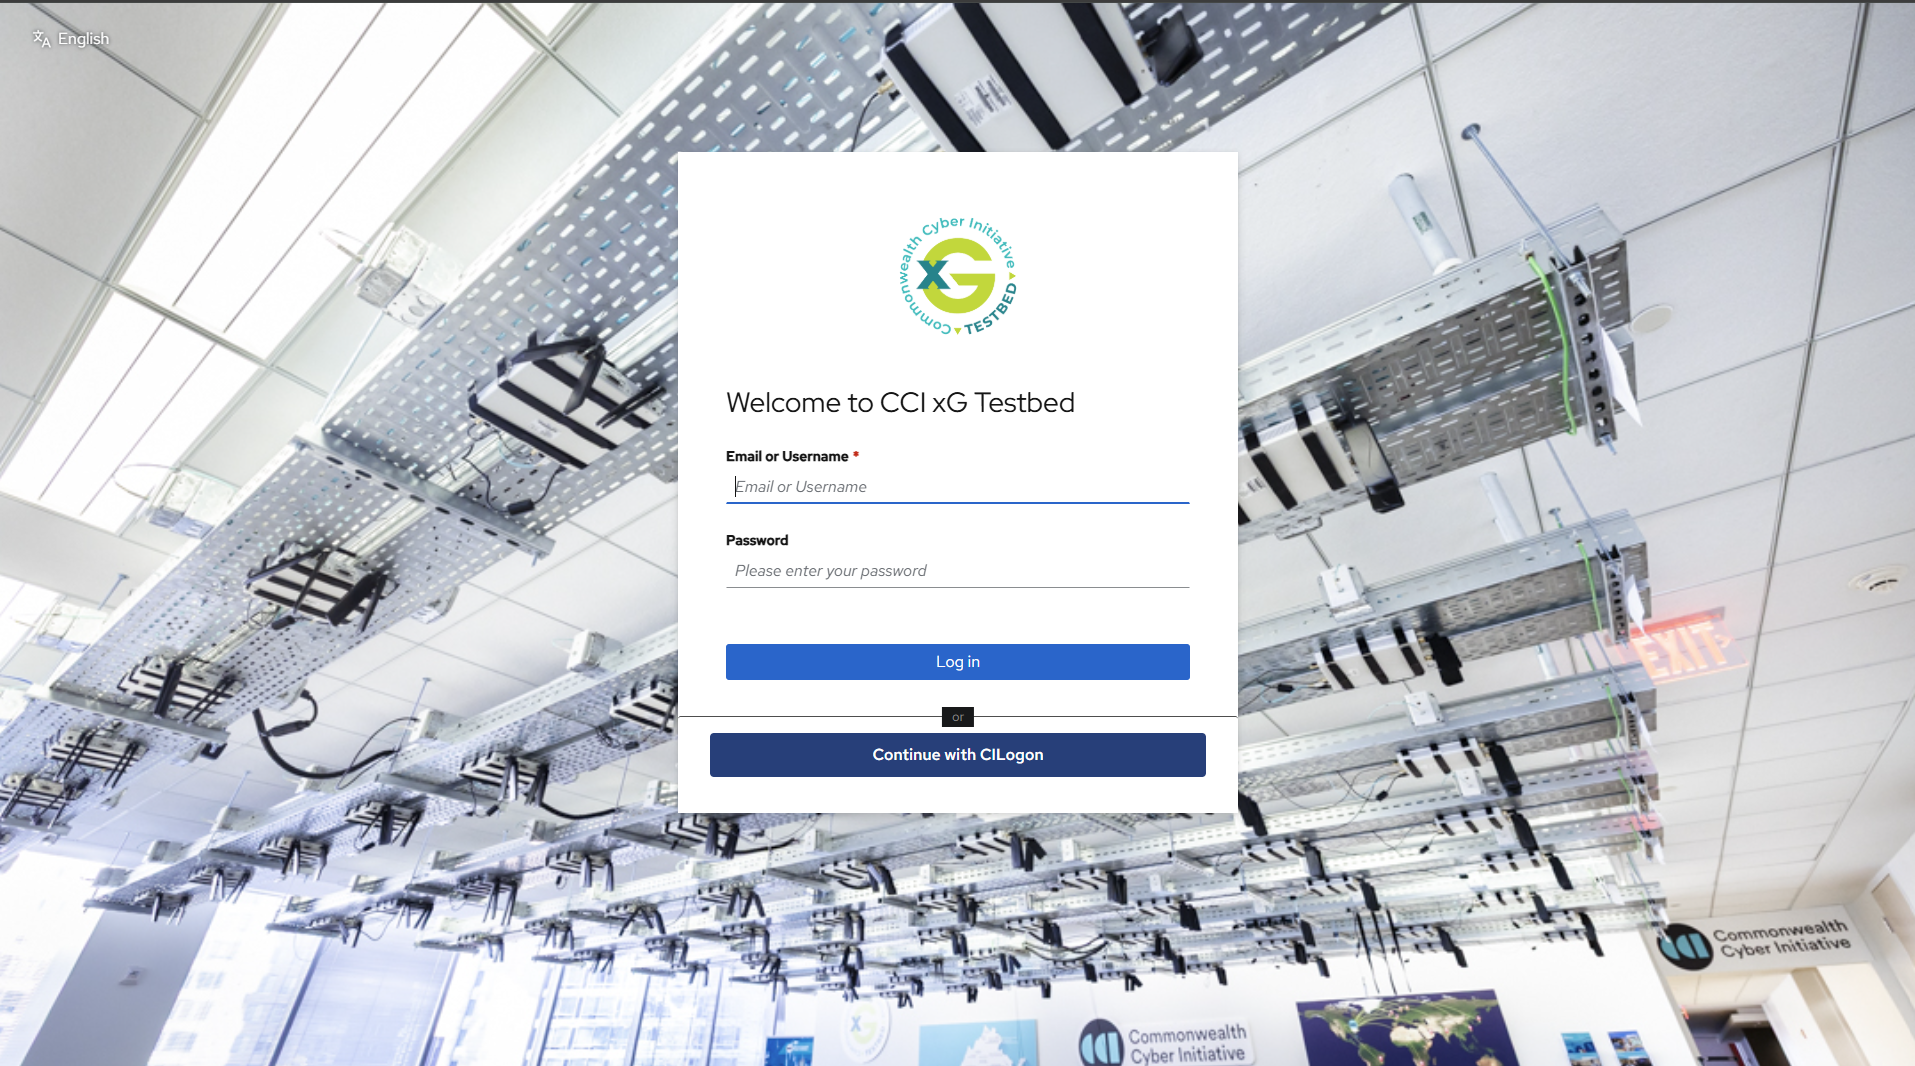
Login page with the CILogon authentication option.
Select Your Institution
On the CILogon page, choose your identity provider, such as Virginia Tech, and click Log On.
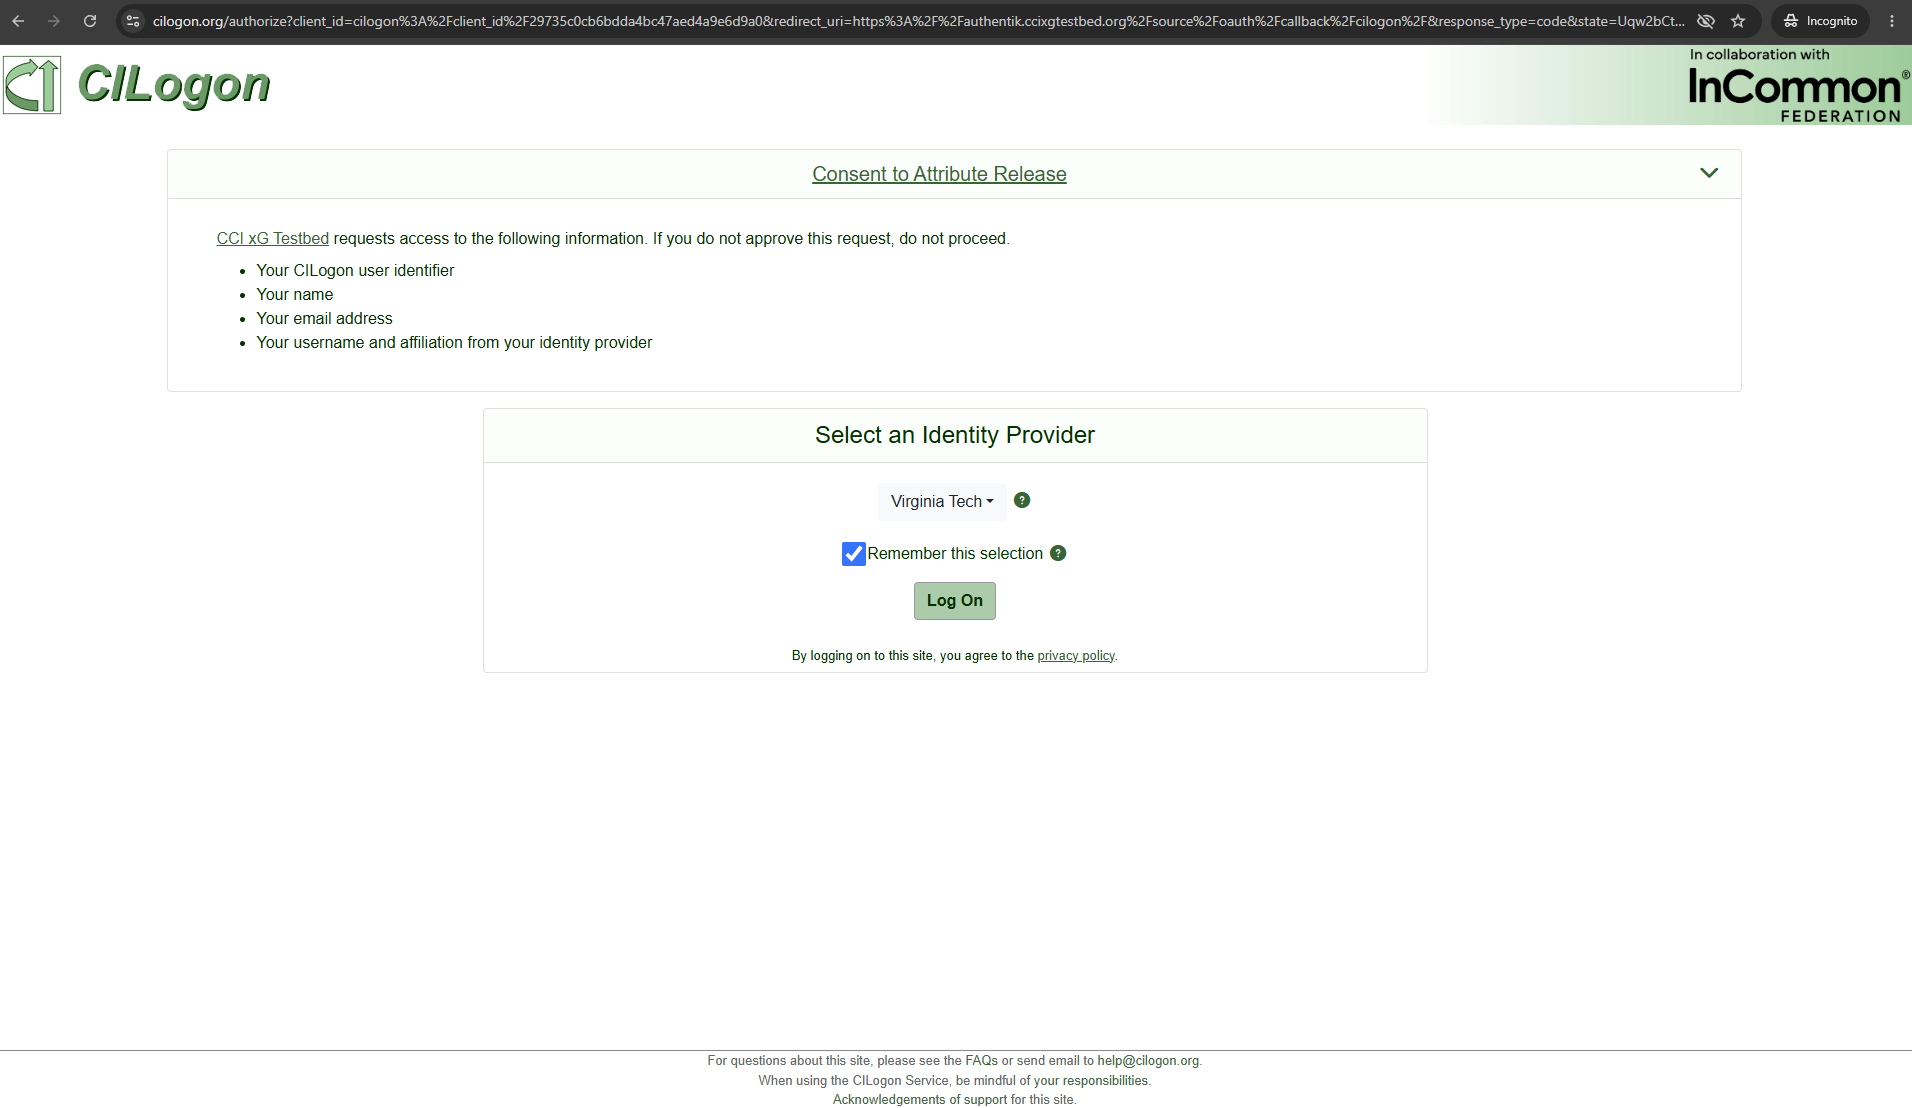
Selecting an institutional identity provider in CILogon.
Approve Access
CILogon may ask you to approve the release of basic account information, such as your name, email address, username, and institutional affiliation. Review the information and continue only if you approve.
Accept the Usage Policy
On your first login, you may be asked to read and accept the CCI xG Testbed Acceptable Use Policy. Check the agreement box and click Continue.
Open Your Dashboard
After successful login, you will be redirected to the My Applications dashboard. This dashboard displays the resource tiles assigned to your account. Click any available tile to launch the corresponding environment, tool, or project platform.
Note
For detailed information on navigating the portal and using assigned resources, refer to the Portal Access Guide.
Attention
When completing the initial request form, be specific about your project requirements in the Purpose of CCI xG Testbed Usage field. This helps ensure that the appropriate resource tiles are allocated to your dashboard.
CCI Dashboard and Experiment Environment
After receiving your access credentials, you’ll begin your journey with the CCI Dashboard, which serves as the central hub for accessing various components of the CCI xG Testbed and launching your experiments.
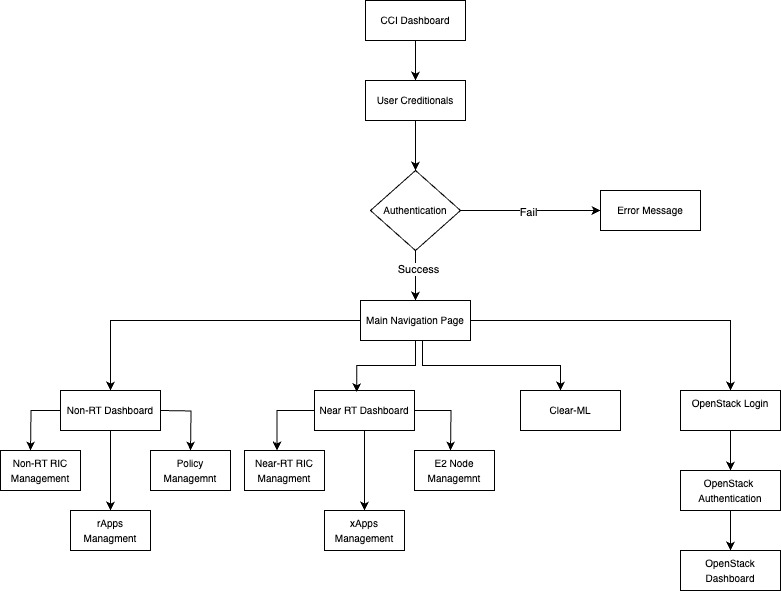
Figure: Experimental User - Workflow Diagram
Dashboard Components
Non-RT Dashboard
If you select the Non-RT Dashboard option, you’ll gain access to:
Non-RT RIC Management: Monitor and configure the Non-RT RIC platform
rApps Management: Deploy, configure, and monitor rApps
Policy Management: Create, edit, and distribute policies to Near-RT RICs
Near-RT Dashboard
If you select the Near-RT Dashboard option, you’ll gain access to:
Near-RT RIC Management: Monitor and configure the Near-RT RIC platform
xApps Management: Deploy, configure, and monitor xApps
E2 Node Management: Monitor and manage E2 Nodes (CU/DU) connected to the Near-RT RIC
Accessing the Experiment Environment via OpenStack
The primary way to access your experiment environment is through the OpenStack dashboard. This is where you’ll create and manage the virtual machines and resources needed for your experiments.
Accessing OpenStack:
From the CCI Dashboard main navigation page, click the OpenStack Login button
You’ll be redirected to the OpenStack authentication page
Enter your OpenStack credentials (provided in your welcome email)
After successful authentication, you’ll access the OpenStack Dashboard
From there, you can create instances, configure networks, manage volumes, and launch your experiment environment
Setting Up Your Experiment Environment:
Once logged into the OpenStack Dashboard, you can:
Create virtual machines with your required specifications
Configure networking for your experiment
Allocate storage resources
Deploy and run your experiment software
Document your experiment setup, track issues, and manage your project timeline using gitlab
For detailed instructions on creating and managing OpenStack instances, please refer to our OpenStack Instance Launch Guide.
Note
For the best experience with the CCI xG Testbed portal and OpenStack dashboard, we recommend using modern web browsers such as Google Chrome, Mozilla Firefox, or Microsoft Edge.