ClearML
Introduction
The integration of an AI/ML Framework within an O-RAN (Open Radio Access Network) setup serves as a pivotal enabler for realizing intelligent, adaptive, and efficient next-generation RAN operations. The primary objective is to harness data-driven learning to optimize network performance in real-time while ensuring openness and interoperability across RAN components.
Architecture
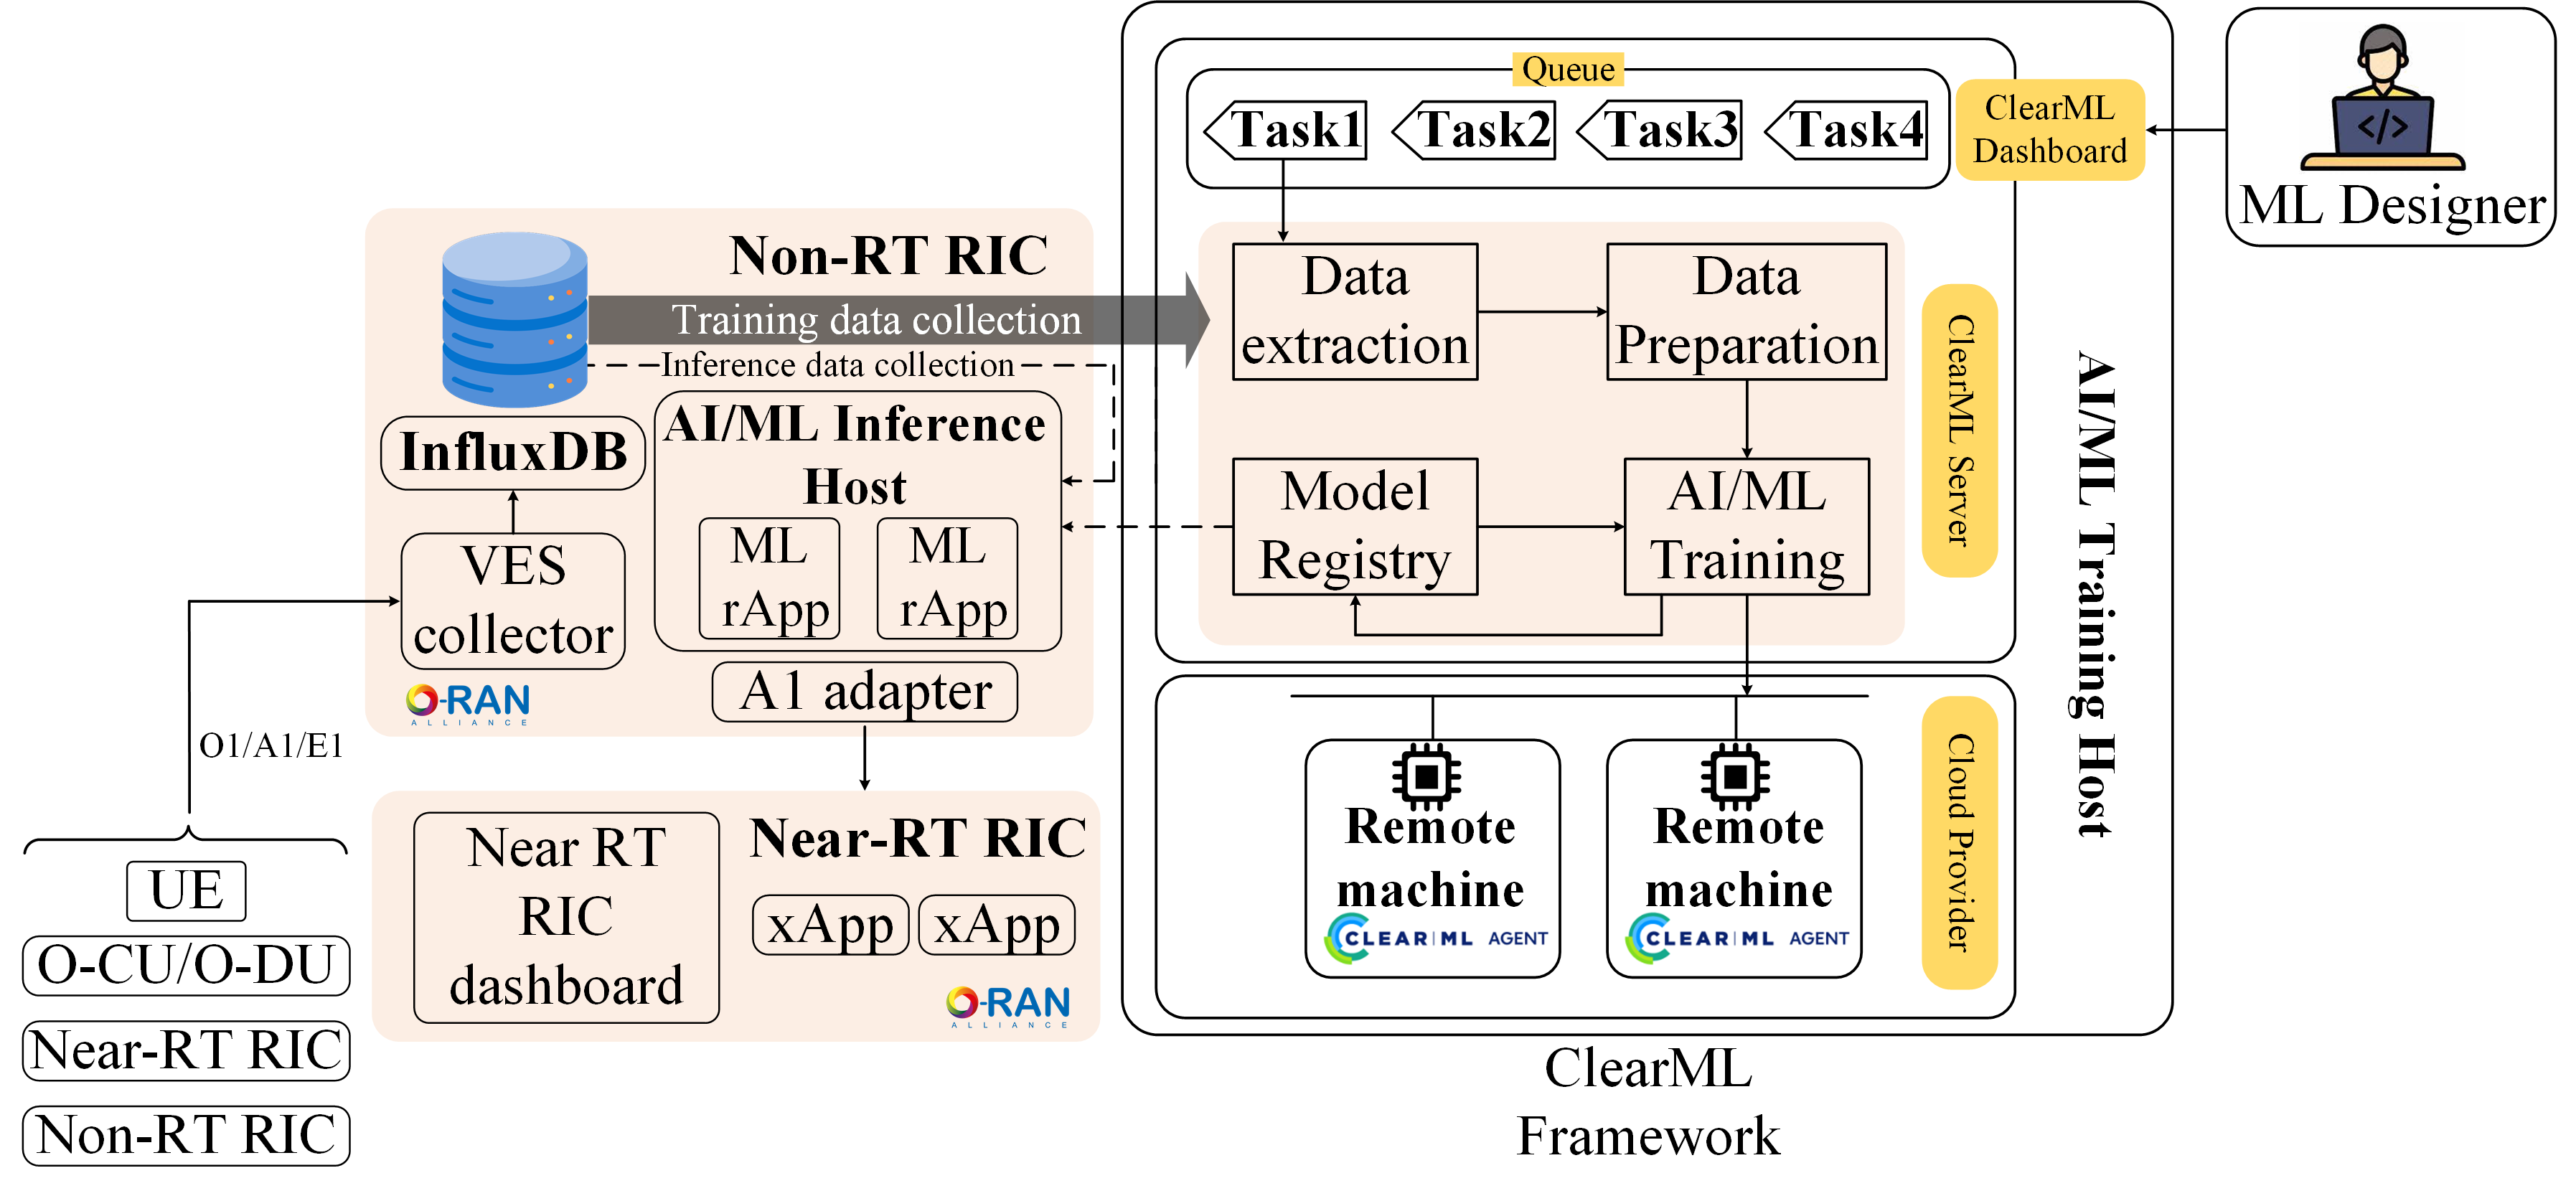
Figure: Integrated AI/ML (ClearML platform) with CCI-xG O-RAN Architecture.
This figure illustrates a ClearML-based AI/ML pipeline integrated with the CCI-xG Testbed O-RAN (Open Radio Access Network) architecture, specifically showing interactions between:
Non-Real-Time RIC (Non-RT RIC)
Near-Real-Time RIC (Near-RT RIC)
ClearML Training Framework
ML Designer
Key Components and Flow:
1. RAW data/telemetry sources:
UE (User Equipment)
O-CU/O-DU (Centralized and Distributed Units)
Near-RT RIC
Non-RT RIC
These components are configured to communicate over standard O-RAN interfaces like O1, A1, and E1.
2. Non-RT RIC:
VES Collector: Gathers telemetry/events from the RAN elements and stores them in InfluxDB, a time-series database.
AI/ML Inference Host: It hosts ML rApps (RIC applications) that perform AI/ML inferences, collects inference data, and communicates with the A1 adapter to push policies or models to the Near-RT RIC, ensuring seamless transfer of inference results.
3. ClearML Framework for AI/ML Training:
A cloud-based setup using ClearML to automate ML workflows.
Raw data from database extraction and storing for ML tasks.
Tasks like model training, data prep, etc., creation and make queue.
Models training execution on extracted and clean data.
Trained models storing and pushing to the AI/ML Inference Host.
Manages task tracking, logging, and coordination.
Perform training on distributed compute nodes using backend ClearML Agents.
ML Designer required configuring and monitoring AI/ML experiments via the ClearML Dashboard.
4. Near-RT RIC:
Receives inference results from the Non-RT RIC.
Executes xApps (Near-RT RIC applications) using ML-generated policies or decisions.
Monitored via the Near-RT RIC dashboard.
Setup
Before Getting Started
Check the Deployment: Ensure that the ClearML server and ClearML agent are deployed in virtual machines (VMs) within the OpenStack project.
If any of the components are missing, please contact the administrator.
ClearML Server: The backend service infrastructure for ClearML. It allows multiple users to collaborate and manage their experiments by working seamlessly with the ClearML Python package and ClearML Agent.
Components:
Web Server: Includes the ClearML Web UI, which is the user interface for tracking, comparing, and managing experiments.
API Server: A RESTful API for: - Documenting and logging experiments, including information, statistics, and results. - Querying experiment history, logs, and results.
File Server: Stores media and models, making them easily accessible via the ClearML Web UI.
Communicate with the ClearML Server:
Create a VM in the OpenStack Project:
Requirements:
Ubuntu 20.04
Flavor: 8 CPU, 8 GB RAM, 128 GB Disk
Create a Virtual Environment:
sudo apt-get update
sudo apt-get install python3-venv
python3 -m venv myenv
Activate the Virtual Environment:
source myenv/bin/activate
Install the ClearML Python Package:
pip install clearml
Connect the ClearML SDK to the Server:
Run the ClearML setup wizard:
clearml-init
The setup wizard will prompt for ClearML credentials:
“Please create new ClearML credentials through the settings page in your `clearml-server` web app (e.g., http://localhost:8080/settings/workspace-configuration), or create a free account at https://app.clear.ml/settings/workspace-configuration. In the settings page, press ‘Create new credentials’, then press ‘Copy to clipboard’. Paste the copied configuration here:”
Note: To get credentials, please contact the administrator.
At the command prompt, paste the copied ClearML credentials. The setup wizard will verify the credentials.
Sample Output:
Detected credentials key="********************" secret="*******"
CLEARML Hosts configuration:
    Web App: https://app.<your-domain>
    API: https://api.<your-domain>
    File Store: https://files.<your-domain>
Verifying credentials ...
Credentials verified!
New configuration stored in /home/<username>/clearml.conf
CLEARML setup completed successfully.
You are now ready to use ClearML in your code!
ClearML Dashboard
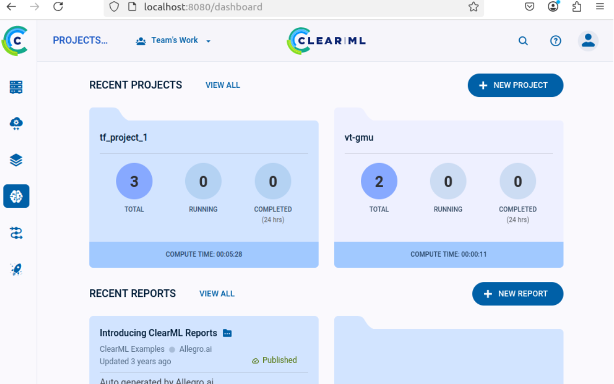
The project dashboard provides a summary of users most recent projects, reports, and tasks. Click a project, report or task to quickly access it.
To access the dashboard:
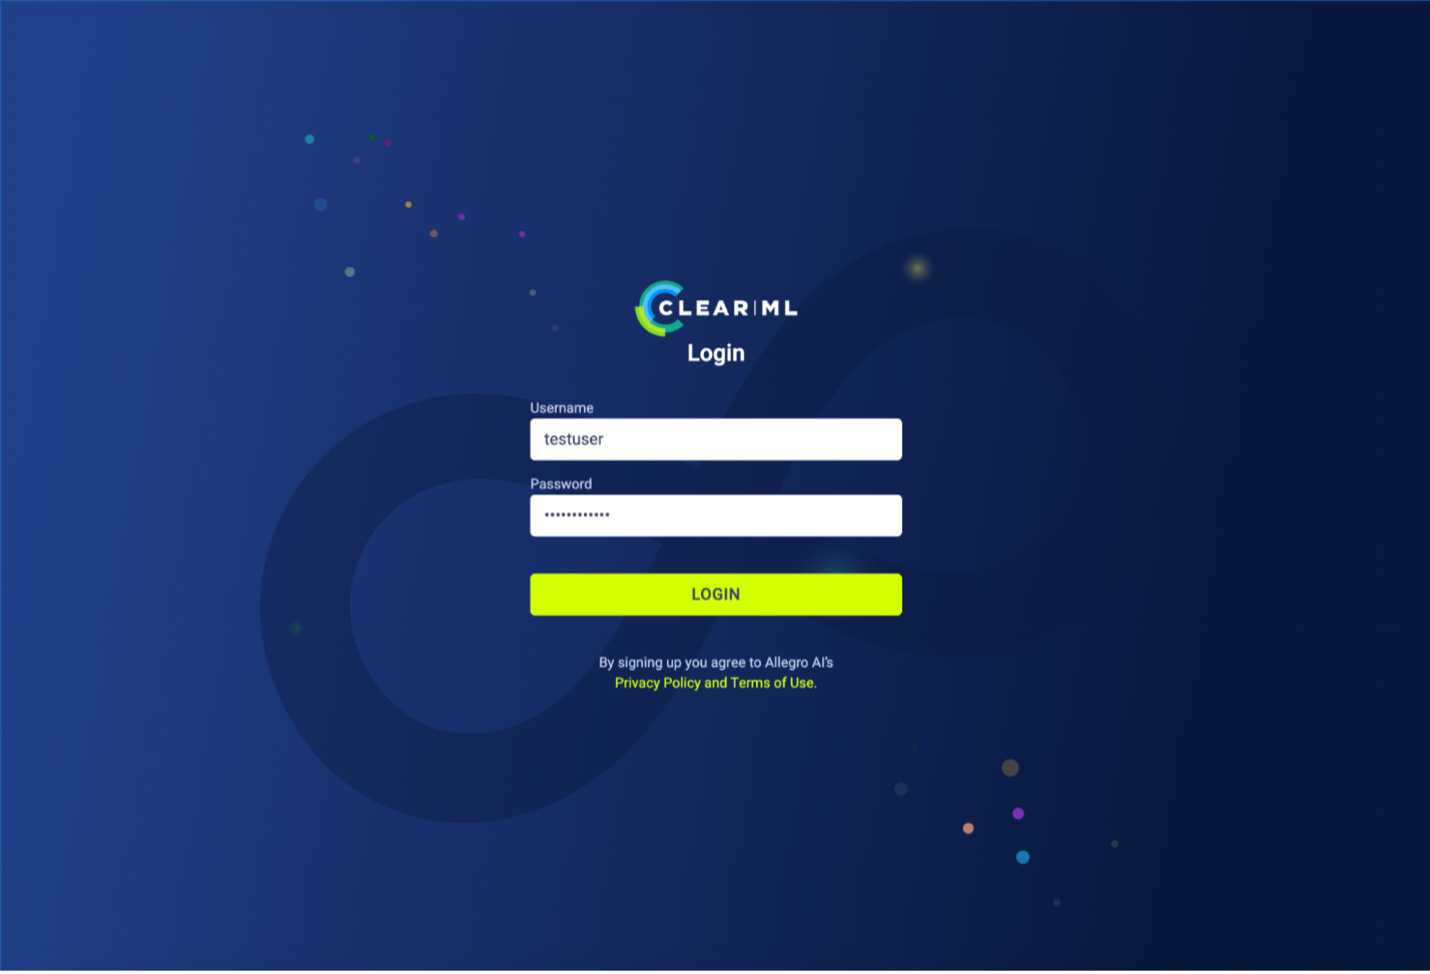
After logging in you can see the project pages, dataset pages, and access various experiment management features from the dashboard.
On the Datasets page, you can view, manage, and create datasets, as well as track their versions and storage usage
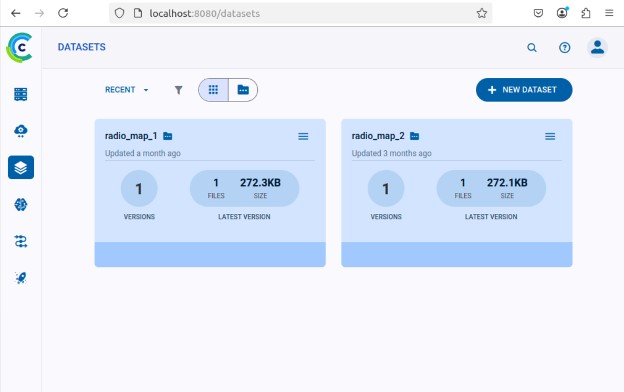
Data Collection, Processing or Management examples
Check InfluxDB Credentials
Ensure you have the following InfluxDB credentials:
INFLUXDB_URL = "..."  # InfluxDB URL
TOKEN = "..."         # Your token
ORG = "..."           # Your organization name
BUCKET = "..."        # Your bucket name
Upload a Dataset from InfluxDB to ClearML Server Storage
Use the ClearML Data Management tool to upload datasets. The following Python code serves as a template:
from clearml import Dataset
from influxdb import InfluxDBClient
import pandas as pd
import time
import io

# InfluxDB credentials and configurations
INFLUXDB_URL = "..."  # Replace with your InfluxDB URL
TOKEN = "..."         # Your token
ORG = "..."           # Your organization name
BUCKET = "..."        # Your bucket name

# Create InfluxDB client
client = InfluxDBClient(url=INFLUXDB_URL, token=TOKEN)

# Define the number of days you want to retrieve data from
X_days = 30  # Change this to the number of days you need

# Calculate the timestamp X days ago from the current time
end_time = int(time.time() * 1e9)  # Current time in nanoseconds
start_time = end_time - (X_days * 24 * 3600 * 1e9)  # X days ago in nanoseconds

# Query data from InfluxDB
query = f'SELECT * FROM "randata" WHERE time >= {start_time} AND time <= {end_time}'
result = client.query(query)

# Convert the result to a Pandas DataFrame
df = pd.DataFrame(result.get_points())

# Convert the DataFrame to a CSV-like string in memory
csv_buffer = io.StringIO()
df.to_csv(csv_buffer, index=False)
csv_buffer.seek(0)  # Reset the buffer to the beginning


print(f"Dataset uploaded to ClearML with ID: {dataset.id}")
Upload your own dataset to ClearML Server Storage
  # Upload the in-memory CSV data to ClearML
dataset = Dataset.create(dataset_name="rapp_data", dataset_project="rapp_examples")
dataset.add_object(csv_buffer, "randata.csv")  # Add the in-memory CSV as an object with a filename
dataset.upload()
dataset.finalize()


print(f"Dataset uploaded to ClearML with ID: {dataset.id}")
Accessing the Uploaded Data and Preparing It
from clearml import Dataset
import os
import pandas as pd
from pathlib import Path
from clearml import Task

# Initialize ClearML Task
task = Task.init(project_name="Your-Project", task_name="Data Preparation", output_uri=True)

# Load dataset from ClearML
dataset_name = "your-dataset-name"
dataset_project = "your-dataset-project"
local_dataset_path = Path(Dataset.get(
    dataset_project=dataset_project,
    dataset_name=dataset_name,
    alias="dataset-alias"
).get_local_copy())

# List all files in the dataset directory
data_files = [data_path for data_path in os.listdir(local_dataset_path) if data_path.endswith(".csv")]
print("Data files:", data_files)

# Function to preprocess a single CSV file
def process_file(file_path):
    df = pd.read_csv(file_path)
    # ... code for preparing the data ...
    return df

# Process all data files
dataframes = [process_file(os.path.join(local_dataset_path, file)) for file in data_files]

# Combine into a single DataFrame
combined_data = pd.concat(dataframes, axis=0).reset_index(drop=True)

# Display basic statistics
print(combined_data.describe())
Preprocessing and Normalization
import pandas as pd
from sklearn.preprocessing import StandardScaler, MinMaxScaler

def preprocess_data(df, numeric_cols=None, fill_strategy="mean", drop_cols=None):
    """
    Preprocess the dataset:
    - Fill missing values
    - Drop unnecessary columns
    - Ensure consistent data types
    """
    # Drop unnecessary columns if specified
    if drop_cols:
        df = df.drop(columns=drop_cols, errors="ignore")

    # Fill missing values
    if fill_strategy == "mean":
        df = df.fillna(df.mean(numeric_only=True))
    elif fill_strategy == "median":
        df = df.fillna(df.median(numeric_only=True))
    elif fill_strategy == "zero":
        df = df.fillna(0)
    elif fill_strategy == "ffill":
        df = df.fillna(method="ffill")
    elif fill_strategy == "bfill":
        df = df.fillna(method="bfill")
    else:
        raise ValueError("Unsupported fill strategy. Use 'mean', 'median', 'zero', 'ffill', or 'bfill'.")

    # Ensure numeric columns are of proper type
    if numeric_cols:
        df[numeric_cols] = df[numeric_cols].apply(pd.to_numeric, errors="coerce")

    return df

def normalize_data(df, cols_to_normalize, method="standard"):
    """
    Normalize the specified columns using the given method:
    - 'standard': StandardScaler (z-score normalization)
    - 'minmax': MinMaxScaler (scale to [0, 1])
    """
    if method == "standard":
        scaler = StandardScaler()
    elif method == "minmax":
        scaler = MinMaxScaler()
    else:
        raise ValueError("Unsupported normalization method. Use 'standard' or 'minmax'.")

    df[cols_to_normalize] = scaler.fit_transform(df[cols_to_normalize])

    return df
Model Training
Creating and Training the Model
import tensorflow as tf
from tensorflow.keras import layers
import numpy as np

# Assuming 'combined_data' is your preprocessed dataset
data = combined_data.to_numpy()

# Split into training, validation, and test sets
train_size = int(0.7 * len(data))
val_size = int(0.15 * len(data))
test_size = len(data) - train_size - val_size

train_data = data[:train_size]
val_data = data[train_size:train_size+val_size]
test_data = data[train_size+val_size:]

train_input, train_labels = train_data[:, :-1], train_data[:, -1]
val_input, val_labels = val_data[:, :-1], val_data[:, -1]
test_input, test_labels = test_data[:, :-1], test_data[:, -1]

# Create the model
model = tf.keras.Sequential([
    layers.Dense(32, activation='relu', input_shape=(train_input.shape[1],)),
    layers.Dense(16, activation='relu'),
    layers.Dense(8, activation='relu'),
    layers.Dense(3, activation='softmax')  # Adjust '3' to the number of classes in your dataset
])

model.compile(optimizer='adam',
              loss=tf.keras.losses.SparseCategoricalCrossentropy(),
              metrics=['accuracy'])

# Train the model
history = model.fit(
    train_input, train_labels,
    validation_data=(val_input, val_labels),
    batch_size=64,
    epochs=15,
    callbacks=[
        tf.keras.callbacks.EarlyStopping(monitor='val_loss', patience=5),
        tf.keras.callbacks.ReduceLROnPlateau(monitor='val_loss', factor=0.1, patience=3)
    ]
)

print("Training complete!")
Evaluation and Logging
import matplotlib.pyplot as plt

# Evaluate the model
test_loss, test_accuracy = model.evaluate(test_input, test_labels)
print(f"Test Loss: {test_loss}, Test Accuracy: {test_accuracy}")

# Log metrics to ClearML
task.get_logger().report_single_value("Test Loss", test_loss)
task.get_logger().report_single_value("Test Accuracy", test_accuracy)

# Log training history
def plot_training(history):
    plt.figure()
    plt.plot(history.history['loss'], label='Train Loss')
    plt.plot(history.history['val_loss'], label='Validation Loss')
    plt.title('Loss Curve')
    plt.legend()
    plt.savefig('loss_curve.png')
    plt.show()

plot_training(history)

# Save the model
model.save("trained_model.keras")
task.upload_artifact("Trained Model", artifact_object="trained_model.keras")
For a step-by-step walkthrough and practical usage, see the ClearML Experiment in the Sample Experiments section.